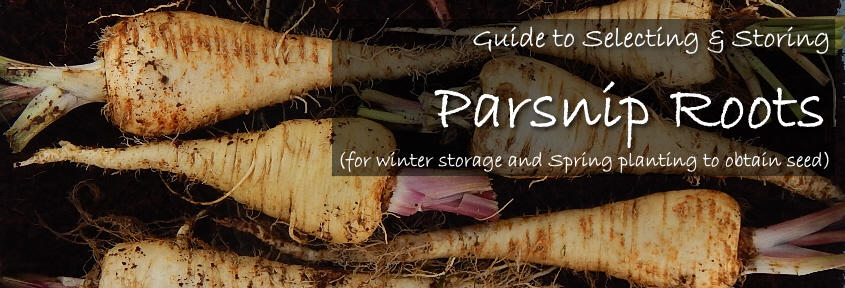
Guide to Selecting & Storing Parsnip Roots:
for Winter Storage and Spring Planting to Obtain Seed
Parsnip (and any other biennial crop such as carrot) require exposure to cold to trigger them to start producing seed.
The requirement for parsnip is that the roots must be subjected to temperatures below 10'C for at least 10 weeks. In most areas of Australia this naturally happens in the garden when plants are left in ground over the winter. (Note: The 10 week time period does not need to be continuous but can be cumulative. ie. if night time temperatures only reach this level with warmer days, then this counts)
While leaving plants in the ground to over-winter is the easiest option, there are a few reasons why we choose to lift and store them away ready for replanting in Spring.
With the digging up of roots it is easy to identify and remove any roots which are not true-to-type, which may be split, forked or show any signs of rot or disease. There is great value in digging the roots for inspection prior to growing on for seed, even if the root is planted back into the soil immediately & left to over-winter in the ground (rather than storing in tubs).
It also allows for proper spacing when roots are re-planted in the Spring to accommodate the size of the plant's second season of growth and its height at seed maturity.
Potential damage from disease, animals and insects is avoided.
Perhaps one of the more practical reasons is that it makes space available in the garden for winter crops such as garlic, onion, spinach, peas etc.
STEP 1: HARVEST ROOTS
Roots are left in the ground until mature & late in the season, ideally at a time when the soil is slightly dry which aids in removal of the soil and prevents excess soil adhearing to the root. Soil around the base of the plant is loosened taking great care not to damage the root. For larger varieties such as 'White Spear' (pictured below), it may be necessary to dig around the root removing soil further down to prevent breakage.
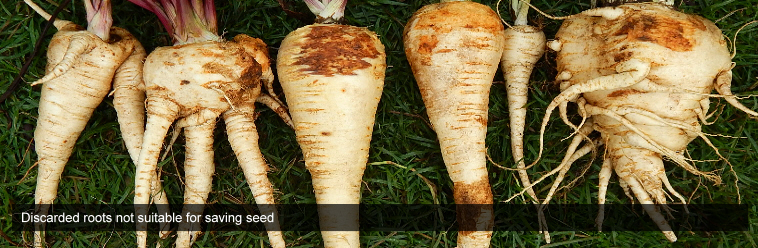
STEP 2: SELECT ONLY THE BEST
Roots should be inspected to identify and remove any diseased, rotten, split or forked roots and those that are not true-to-type. Plants which have started to flower prematurely should also have been removed by now. Often traits such as premature flowering and forking are traits that may be passed onto the next generation.
.jpg)
.jpg)
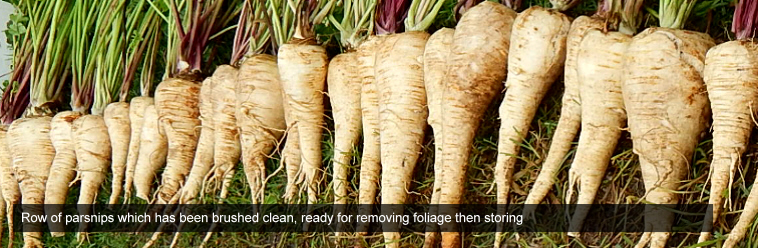
STEP 3: ROOTS CLEANED
Foliage of roots is cut off just above the root (approx. 1 to 1.5cm) with secateurs, scissors or a shovel taking care not to cut too close to the crown. The foliage is then trimmed further using a sharp knife to remove as muchexcess foliage as possible without damaging the top part of the parsnip (where the plant will sprout from again in Spring). The removal of the foliage is important in preventing decay & rot during storage, as well as reducing loss of moisture from the root.
Roots are then brushed clean to remove any soil & plant material. It is best to brush or rub the root clean gently using your hand rather than washing or spraying with the hose. It is believed that the beneficial bacteria left on the surface of the root when it is brushed only, deters any destructive pathogens from multiplying & causing damage during storage.
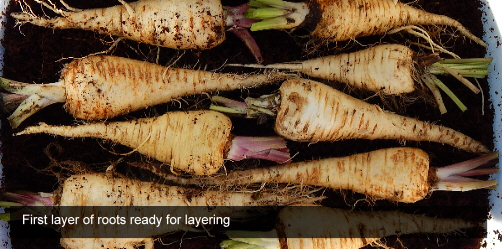
STEP 4: LAYERING
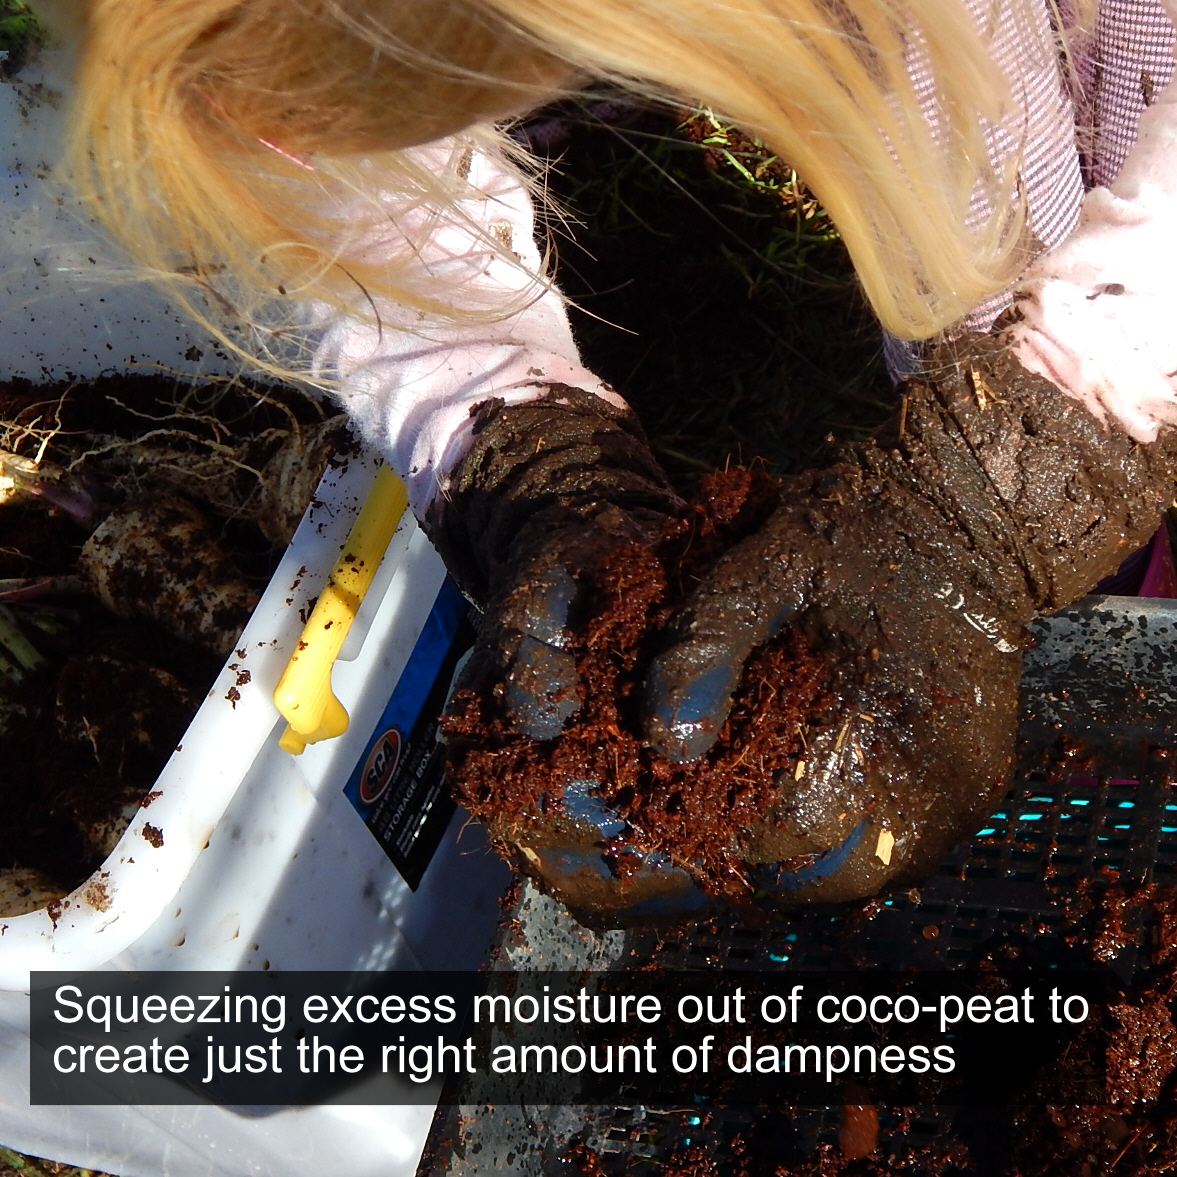
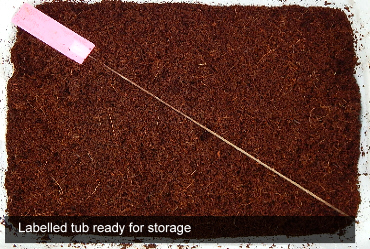
A ventilated tub (ie. rubbish bin or plastic tub with small holes drilled in the sides) should be used to place the first layer of roots. Roots should be placed in a single layer on top of each other ensuring that they are not touching each other. Each root and layer is separated from each other using coco-peat (coconut fibre) which should be damp but not too moist, finishing off with coco-peat to cover. A mix of wood shavings & coco-peat or sand may also be used successfully. Be sure to label the tub to avoid any loss of identity.
An alternative for the home gardener saving seed from only a few roots may simply be to use a plastic zip-lock bag containing coco-peat with a few holes 'poked' in the side, which is then stored in the crisper section of the refrigerator.
.jpg)
STEP 5: STORAGE
Root tubs should be stored in a cool, dry, dark place until ready to plant out in spring. Ideal temperature for storage should range from 1-7'C. Suitable locations may be in a cool, shaded shed, laundry, or under the house.
During this time it is important to monitor the roots periodically (approx. every 6-8 weeks) to check for dryness, rot or disease with any affected roots being promptly removed.
That's it - job done!
This method may be used for all biennial root crops.